


Alco NH low profile cab kit Proto 2000 S1
Made by
Print With Shapeways
 Choose Your Material
 Choose your color and finish
$32.37
Have a question about this product?
contact the designerYou must be logged in and verified to contact the designer.
Product Description
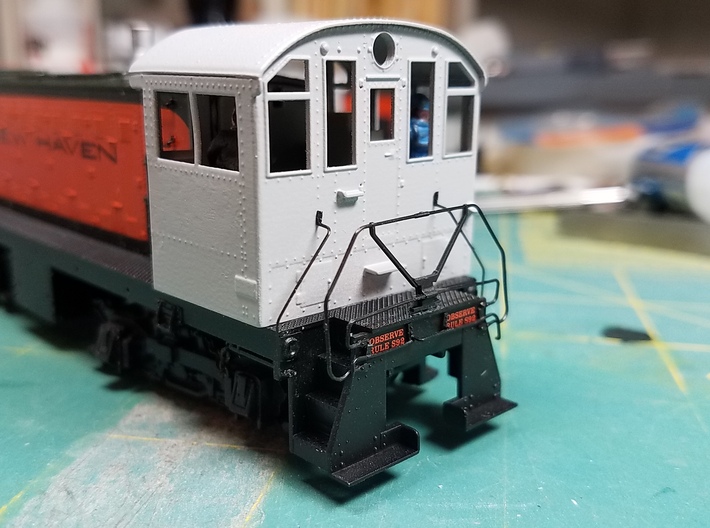
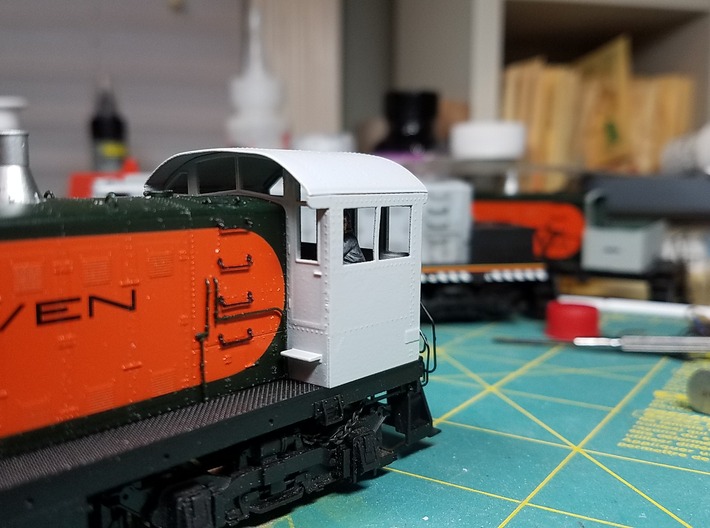
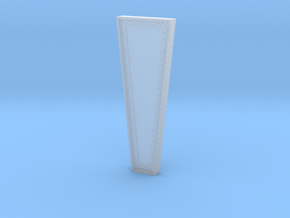
When the New Haven Railroad ordered Alco S1 and S2 switchers the railroad specified a low profile cab instead of the standard cab. This cab is designed as a kit to replace the standard cab of the new Proto S1. This cab was designed from low profile cab elevation drawings found in NHRHTA Shoreliner Vol. 35 Issue 1 and other photos of New Haven S1s and S2s from various sources.
This product has been updated. Please look at https://nemodelworks.com/new-haven-alco-switcher-low-profile-cabs/ for other available variations.
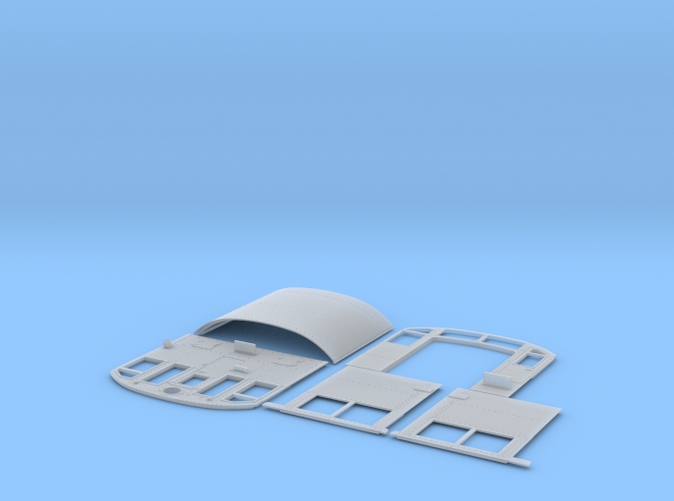
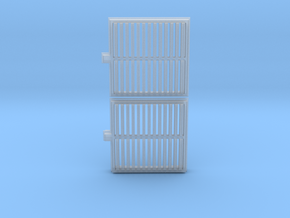
This cab was designed to be printed as a five piece flat kit with all the visible surfaces of the parts oriented to maximize the detail during the 3D printing process. Shapeways Frosted Extreme Detail material should be specified for best results. Shapeways recently changed the name of this material to Smoothest Fine Detail Plastic.
The parts have some striations on what should be smooth surfaces due to the current limitations of 3D printing. The parts can be primed with a primer containing fillers like Mr. Primer Surfacer 1000 or Tamiya Fine Surface Primer to make the surfaces smoother. Alternatively, the surfaces could be sanded smooth and Archer rivets applied to replace the rivets removed while sanding.
There are mitered joints at the four corners of the cab. The cab roof is designed with a thicker portion inside the cab that forms joints with the inside of the front, back and sides to align it properly during assembly.
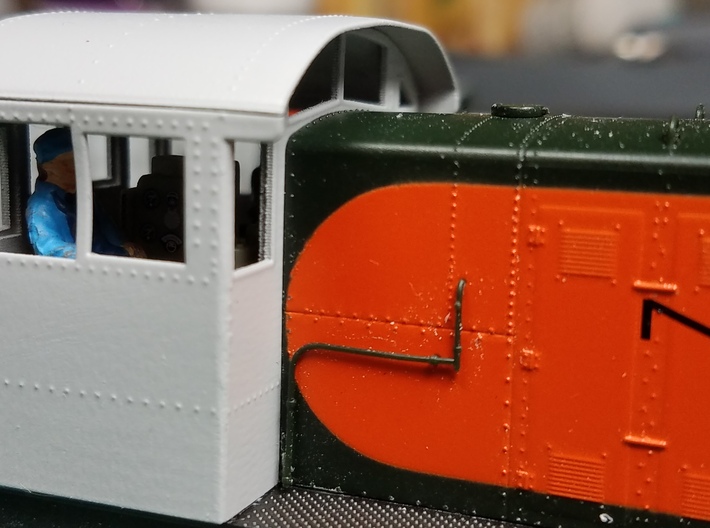
There are recesses in the front, back and sides to allow installation of clear window material closer to the external window frames for a "closer to flush" appearance. It is suggested the window material should be cut to fit the recesses before assembling the cab. The window material for the two windows over the hood on the cab front need to be trimmed at the top to allow room for the portion of the roof that is thicker inside the cab. Once the cab is assembled and painted the window material should be applied using canopy cement.
A set of 0.010 clear styrene windows has been designed in 2D vector graphics to allow them to be cut by a Cricut machine. Please contact me directly to order window glazing sets for $5 including shipping. I can be reached by email at mlredden1 (at) gmail.com, or by sending me a message on the Shapeways site.
The parts should be cleaned before assembly to remove any waxy support material. The parts can be cleaned in an ultrasonic cleaner with some Simple Green in warm water, followed by a rinse with clear water.
The cab can be assembled using CA along all joint lines from the inside. The parts may need some light sanding to remove surface roughness to make a good fit where they are joined.
I assembled the cab back to the cab sides using a Coffman Mini Right Clamp with some small strip styrene spacers on the back of the sides to hold the parts square. Then I added the roof and finally the cab front. See illustrated assembly instruction in my blog post How to assemble five piece cab kits.
Joe Smith used a different method to assemble his cab. See the link to his blog post below.
The Proto 2000 S1 angled handrails from the back of the cab to the steps can be installed on this cab by drilling holes in the cab back at the proper locations. The handrails on either side of the door on the back of the cab should be formed from 0.016 inch brass wire. A handrail bending jig has been recently added for easy bending of the rear handrails. It must be purchased separately.
The Proto S1 cab variant needed to be made two inches taller to fit the Proto S1 hood. There may be some variance in the hood height of individual Proto S1 models. After assembling the S1 cab some sanding of the bottom of cab may be necessary if there is any gap between the top of the hood and the bottom of the cab front over the hood.
The rear light is sized for an MV clear lens #136. The New Haven substituted brass three-chime whistles instead of standard diesel horns. A Custom Finishing #103 whistle can be used.
Joe Smith, a very skilled modeler, describes the methods he used to build a model of a New Haven Alco S-1 using this cab in a post on his blog site, Signal Station 199. Joe's post is available here: https://signalstation199.blogspot.com/2018/07/alco-s-1-switcher-new-haven-with-low.html.
This product has been updated. Please look at https://nemodelworks.com/new-haven-alco-switcher-low-profile-cabs/ for other available variations.
This cab was designed to be printed as a five piece flat kit with all the visible surfaces of the parts oriented to maximize the detail during the 3D printing process. Shapeways Frosted Extreme Detail material should be specified for best results. Shapeways recently changed the name of this material to Smoothest Fine Detail Plastic.
The parts have some striations on what should be smooth surfaces due to the current limitations of 3D printing. The parts can be primed with a primer containing fillers like Mr. Primer Surfacer 1000 or Tamiya Fine Surface Primer to make the surfaces smoother. Alternatively, the surfaces could be sanded smooth and Archer rivets applied to replace the rivets removed while sanding.
There are mitered joints at the four corners of the cab. The cab roof is designed with a thicker portion inside the cab that forms joints with the inside of the front, back and sides to align it properly during assembly.
There are recesses in the front, back and sides to allow installation of clear window material closer to the external window frames for a "closer to flush" appearance. It is suggested the window material should be cut to fit the recesses before assembling the cab. The window material for the two windows over the hood on the cab front need to be trimmed at the top to allow room for the portion of the roof that is thicker inside the cab. Once the cab is assembled and painted the window material should be applied using canopy cement.
A set of 0.010 clear styrene windows has been designed in 2D vector graphics to allow them to be cut by a Cricut machine. Please contact me directly to order window glazing sets for $5 including shipping. I can be reached by email at mlredden1 (at) gmail.com, or by sending me a message on the Shapeways site.
The parts should be cleaned before assembly to remove any waxy support material. The parts can be cleaned in an ultrasonic cleaner with some Simple Green in warm water, followed by a rinse with clear water.
The cab can be assembled using CA along all joint lines from the inside. The parts may need some light sanding to remove surface roughness to make a good fit where they are joined.
I assembled the cab back to the cab sides using a Coffman Mini Right Clamp with some small strip styrene spacers on the back of the sides to hold the parts square. Then I added the roof and finally the cab front. See illustrated assembly instruction in my blog post How to assemble five piece cab kits.
Joe Smith used a different method to assemble his cab. See the link to his blog post below.
The Proto 2000 S1 angled handrails from the back of the cab to the steps can be installed on this cab by drilling holes in the cab back at the proper locations. The handrails on either side of the door on the back of the cab should be formed from 0.016 inch brass wire. A handrail bending jig has been recently added for easy bending of the rear handrails. It must be purchased separately.
The Proto S1 cab variant needed to be made two inches taller to fit the Proto S1 hood. There may be some variance in the hood height of individual Proto S1 models. After assembling the S1 cab some sanding of the bottom of cab may be necessary if there is any gap between the top of the hood and the bottom of the cab front over the hood.
The rear light is sized for an MV clear lens #136. The New Haven substituted brass three-chime whistles instead of standard diesel horns. A Custom Finishing #103 whistle can be used.
Joe Smith, a very skilled modeler, describes the methods he used to build a model of a New Haven Alco S-1 using this cab in a post on his blog site, Signal Station 199. Joe's post is available here: https://signalstation199.blogspot.com/2018/07/alco-s-1-switcher-new-haven-with-low.html.
Details
What's in the box:
Alco NH low profile cab kit Proto 2000 S1
Dimensions:
Success Rate:
First To try.
What's this?
Rating:
Mature audiences only.


