I have a few paperweight objects in my store in both porcelain and SF plastics. Solid ceramic isn't super expensive but an equivalent solid blob of SF plastic will make your wallet cry. On the other hand porcelain won't give you the best surface resolution for finer details. So what to do? How about filling a hollow SF paperweight with something to make it solid and heavier?
I could have used a two part resin mix but I wanted something cheaper and less toxic in terms of chemicals being used. I decided to experiment with mixing sand and Elmer's glue to create a mix that would be heavier and less apt to shrinking than just plain glue. The concept is that the sand grains would limit the amount of shrinkage as the glue/sand mix dries and the grains begin to contact each other. The sand I used is white silica sand and the Elmer's glue is their "WoodGlue Max, now waterproof & stainable formula!" This glue is slightly brown when dry but it's not something you're going to see through the SF plastic. For additional weight and even less shrinkage mixing some pebbles or small ball bearings into the mix should also work, but that's an experiment for another day.
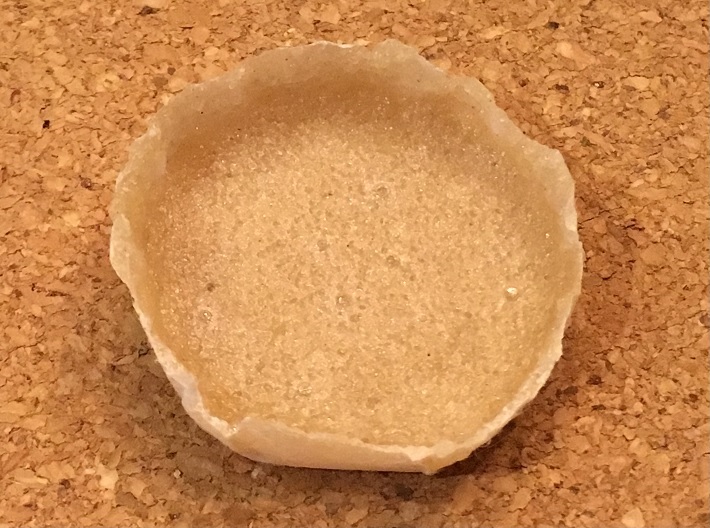
Here's a photo of the first test mix after it dried. I mixed it so it would remain runny enough to self-level. Using too much sand makes the mix chunky and it won't flow. It was mixed in a paper condiment container and I ripped the sides off after it dried. The result is super-duper stiff like a rock and feels like hard plastic. The surface is a bit bubbly as trapped air must have risen from the mix as it dried.
The method I settled on is to lay down thin layers, roughly a half centimeter or less at a time so this is a several day if not several week process for something that needs a lot of filling. But it's cheaper so that works for me! After pouring the mix I place the object being filled in a Ziploc bag overnight to prevent the glue from drying right away. This gives the sand a chance to settle to the bottom and a thin layer of just glue to form at the top. The following day one or two thin dustings of additional sand can be put on the surface to saturate the mix and get a bubble-free finish. Follow that with several days of drying at room temperature before adding the next layer. You could do things differently depending on your levels of patience and desired result. It's an experiment!
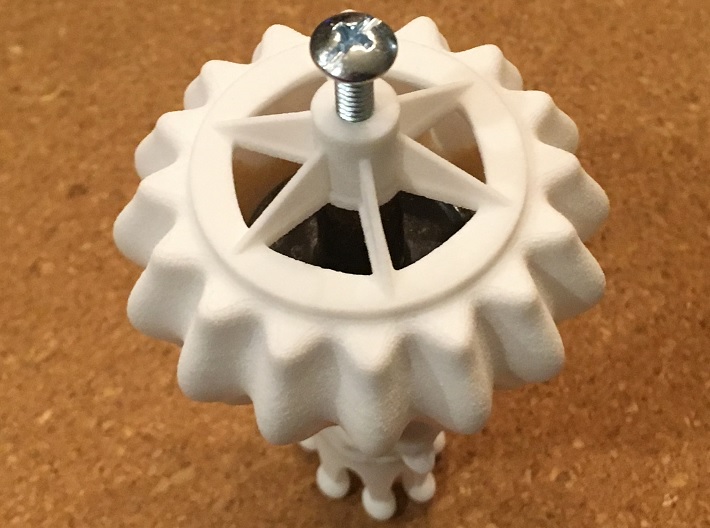
For the actual paperweight I also wanted a screw thread present on the bottom of the weight just in case I wanted to screw it down onto a surface. For this I'm using a pre-tapped metal drawer pull knob that will get glued into the paperweight. To keep it centered and flush with the bottom I also had a centering jig 3D printed. The knob gets screwed onto the jig and then dropped into the paperweight once you get to the proper glue/sand mix layer. Once the bottom of the knob is securely glued in place additional layers would be poured until the paperweight is finally filled. Well that's the plan. I'll post the final results in a week or two or three or four when all the layers have cured.
Here's a photo of the paperweight and the centering jig with knob. The paperweight has already been filled with 3 layers of glue/sand mix (including the hollow head which I did all at one time). The next layer of glue mix should begin to contact the knob.
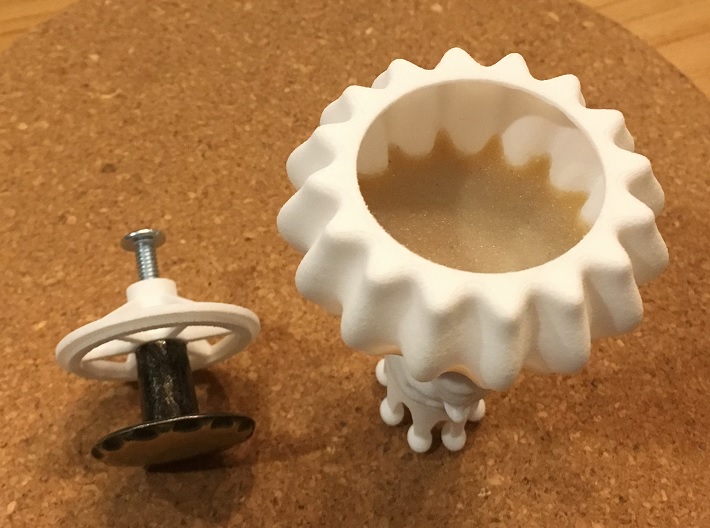
Finally here's the paperweight with the knob attached to the centering jig and dropped into the paperweight ready for another layer of glue mix.