
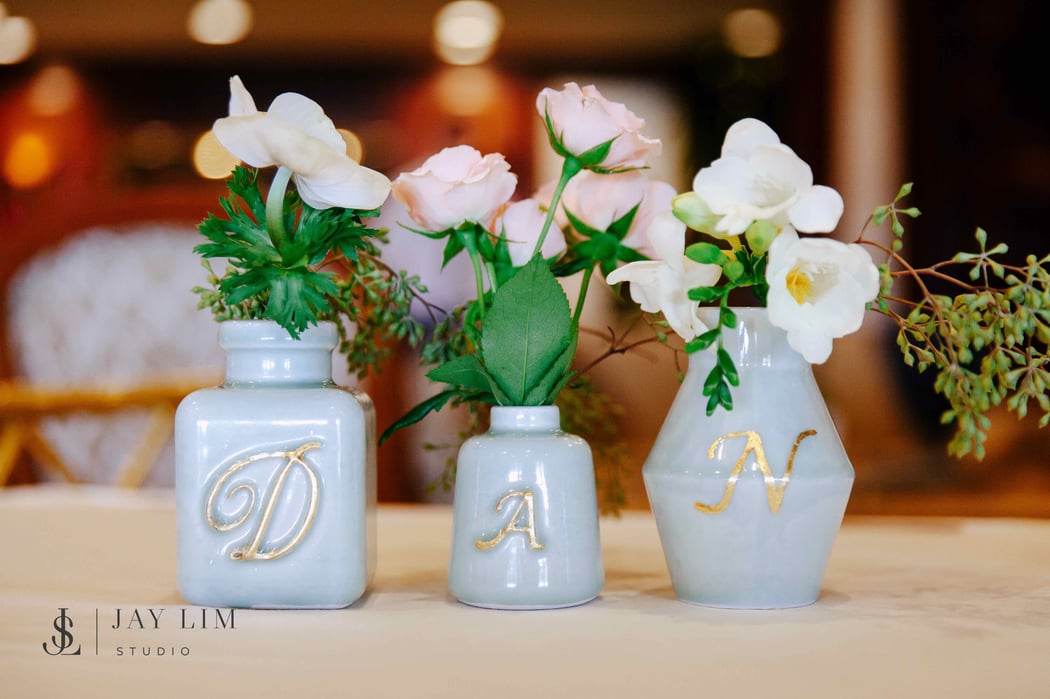
Dan here, back at it again with another wedding tutorial–this time to show you how I made one of the 3D printed porcelain vases for my wedding.

One of the key things I kept in mind while designing the vase was exceeding the minimal guidelines for porcelain by a healthy margin to ensure production went smoothly. While in certain situations you can get by with 3.0mm walls, having walls that are >4.0mm is a much safer bet in addition to making sure any sharp edges are smoothed out. Otherwise, you risk challenges with glazing.
To create the square vase, I started off with a square base in OnShape.

Next, I extruded it into a box.

I used the shell tool to make it hollow.

I created a new sketch off the face of the top for the “cup”.

Then I extruded again.

Next, I created the neck of the vase.

Then a thicker opening.

To wrap up the main body of the vase I realized I needed some more material on the bottom so I made a foot.

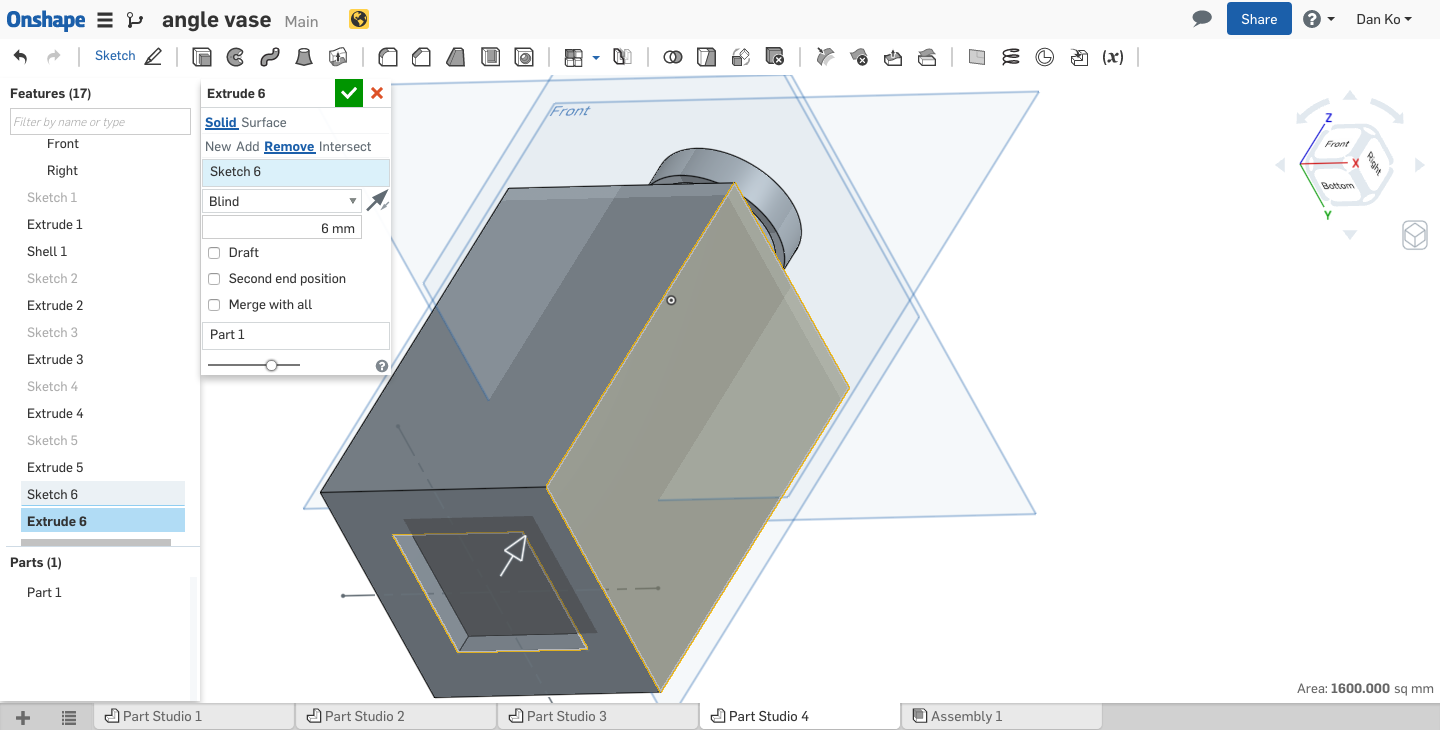
Finally, I smoothed everything out by adding fillets to all the edges. I did this on the inside as well.

Once the file was done, I uploaded it to my Shapeways account and used the custom maker tool there to add the lettering.
You can learn more about custom maker, the gilt lettering and my entire entire design and printing process here.
Have a story about decorations or favors you designed and 3D printed for your wedding? Share it with us!