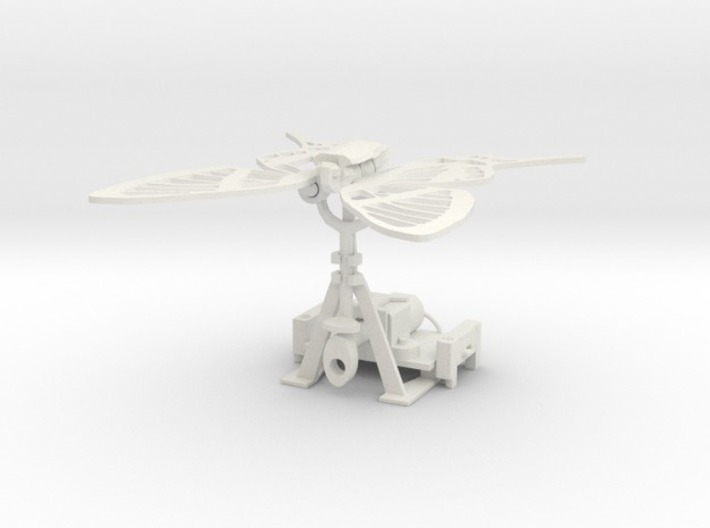
An assembled view illustrating how it all fits together and snaps to the littleBits motor


littleBits Butterfly Motor Kit
Made by
Print With Shapeways
 Choose Your Material
 Choose your color and finish
$40.02
Have a question about this product?
contact the designerYou must be logged in and verified to contact the designer.
Product Description
A kit to attach a butterfly to the littleBits motor module. Press a button to make the butterfly wings flutter gently.
I have not tested a shapeways print of this kit, so parts may need to be sanded or adjusted slightly with a hobby knife to make them fit smoothly. I have tested it printed on a lower quality 3d printer with a fake littleBit motor where it worked great. From shapeways, this is printed as a kit that must be assembled, and the motor and other littleBit components must be purchased from littleBits. This is a first pass at a project to merge an artistic, organic form with the high tech of littleBits.
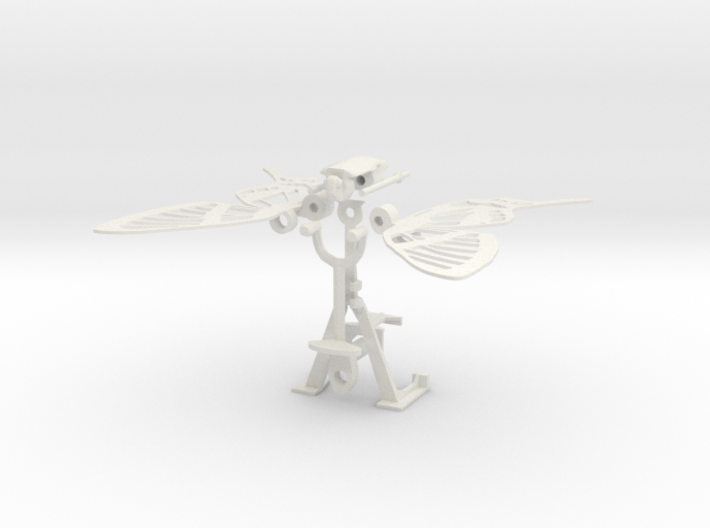
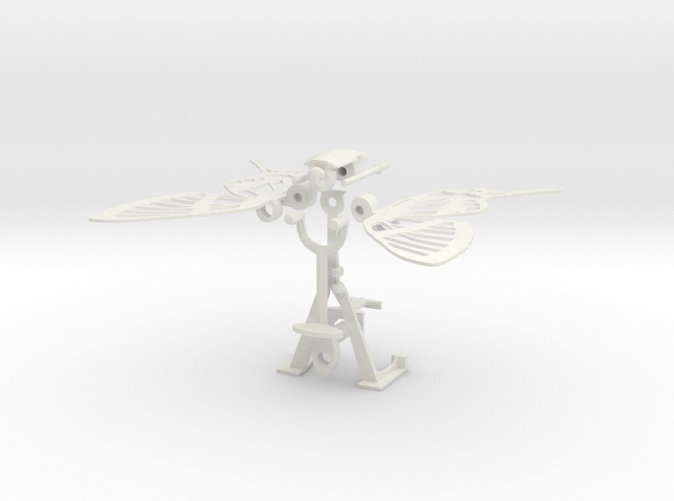
To assemble the butterfly kit, first attach the Y shaped yoke piece to the stand by slotting it into the two holding brackets. Then attach each wing guide to the yoke with the larger bore under each wing. The hold in the top of the stand should be between the two central pivots that sticks out from the side of the wing. Put the body piece over the three pieces, lining everything up straight. There are two central axle versions - (I haven't been able to see an actual print of this yet to see if the first will work) - first try the one with the flare all around. The thin side needs to be inserted first, and the flared piece should snap in. If it doesn't fit, try the second axle, or try trimming it slightly with a hobby knife. Now the butterfly piece is complete, and it needs to be attached to the littleBits motor.
Attach the oval cam driver to the axle of the littleBit motor as far in as it will go. You may have to blow out some powder to fully insert the axle. Next, slide the feet of the stand underneath the motor board, and snap the claw section around the box of the motor. The whole butterfly assembly should be fairly securely held to the motor littleBit now.
Basic littleBits layout:
Power -> Button -> Motor.
Just plug it all together and press the button to see the wings flutter in time with the motor. If you have a slider control, you can put it in and control the speed of the butterfly's flapping. Or use the flapping with a light sensor to make a butterfly that flaps when sunlight hits it. The possibilities are up to your imagination.
I have not tested a shapeways print of this kit, so parts may need to be sanded or adjusted slightly with a hobby knife to make them fit smoothly. I have tested it printed on a lower quality 3d printer with a fake littleBit motor where it worked great. From shapeways, this is printed as a kit that must be assembled, and the motor and other littleBit components must be purchased from littleBits. This is a first pass at a project to merge an artistic, organic form with the high tech of littleBits.
To assemble the butterfly kit, first attach the Y shaped yoke piece to the stand by slotting it into the two holding brackets. Then attach each wing guide to the yoke with the larger bore under each wing. The hold in the top of the stand should be between the two central pivots that sticks out from the side of the wing. Put the body piece over the three pieces, lining everything up straight. There are two central axle versions - (I haven't been able to see an actual print of this yet to see if the first will work) - first try the one with the flare all around. The thin side needs to be inserted first, and the flared piece should snap in. If it doesn't fit, try the second axle, or try trimming it slightly with a hobby knife. Now the butterfly piece is complete, and it needs to be attached to the littleBits motor.
Attach the oval cam driver to the axle of the littleBit motor as far in as it will go. You may have to blow out some powder to fully insert the axle. Next, slide the feet of the stand underneath the motor board, and snap the claw section around the box of the motor. The whole butterfly assembly should be fairly securely held to the motor littleBit now.
Basic littleBits layout:
Power -> Button -> Motor.
Just plug it all together and press the button to see the wings flutter in time with the motor. If you have a slider control, you can put it in and control the speed of the butterfly's flapping. Or use the flapping with a light sensor to make a butterfly that flaps when sunlight hits it. The possibilities are up to your imagination.

Details
What's in the box:
littleBits Butterfly Motor Kit
Dimensions:
Success Rate:
First To try.
What's this?
Rating:
Mature audiences only.

More From This Shop
$48.35
$112.77
$48.79