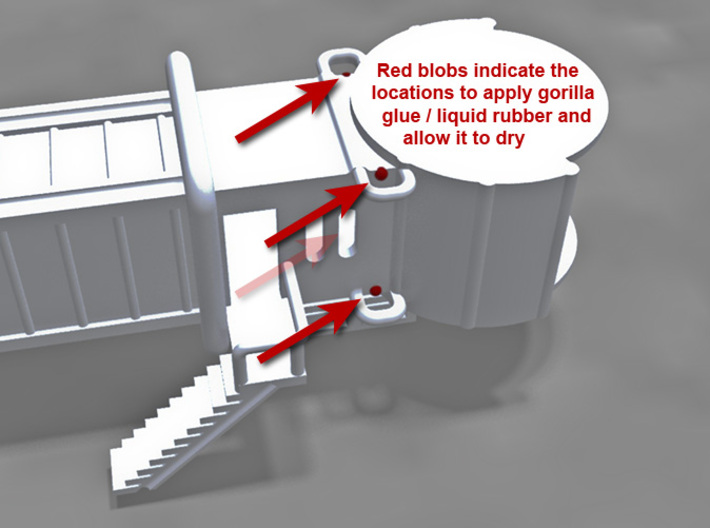
Add gorilla glue / liquid rubber blobs here


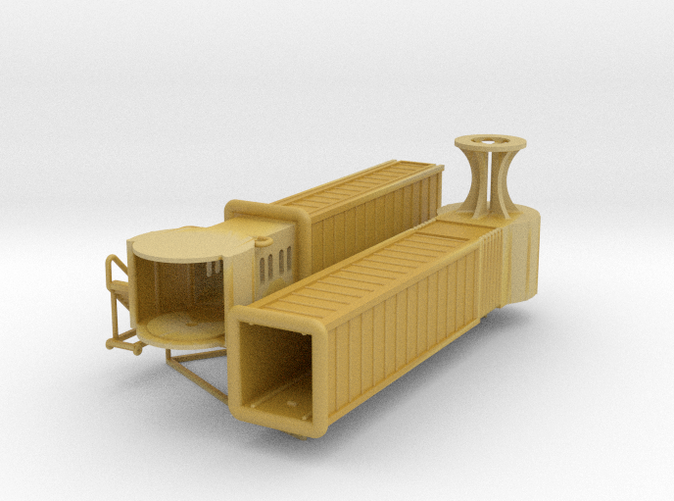
Articulated airport jetway (aerobridge), 1:200
Print With Shapeways
 Choose Your Material
 Choose your color and finish
$88.21
Have a question about this product?
contact the designerYou must be logged in and verified to contact the designer.
Product Description
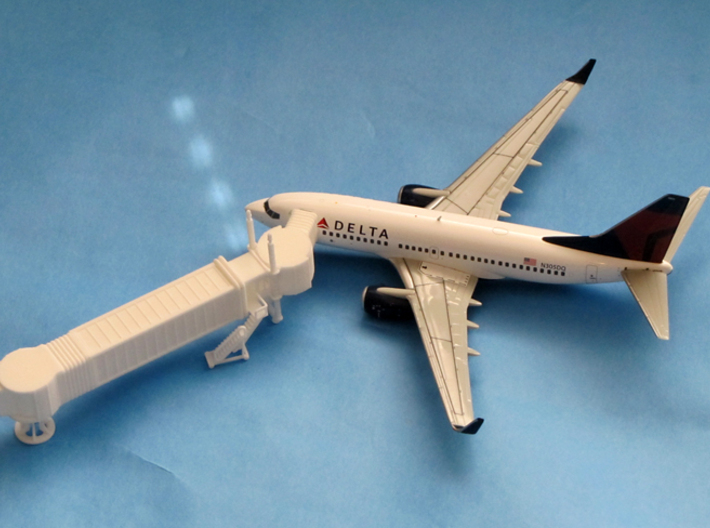
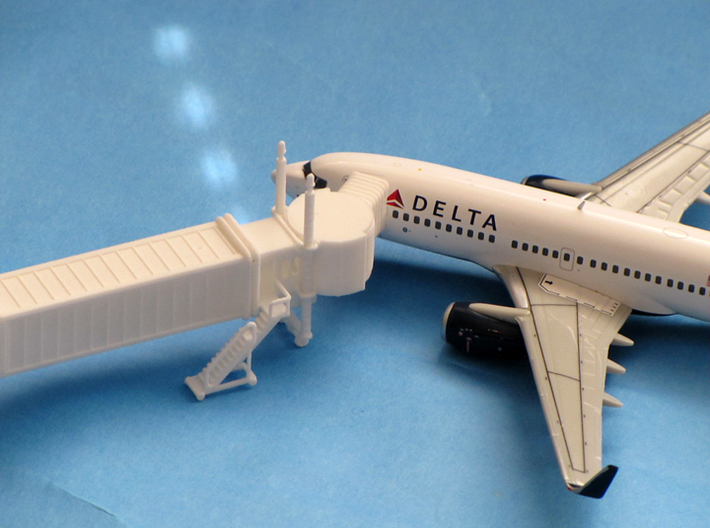
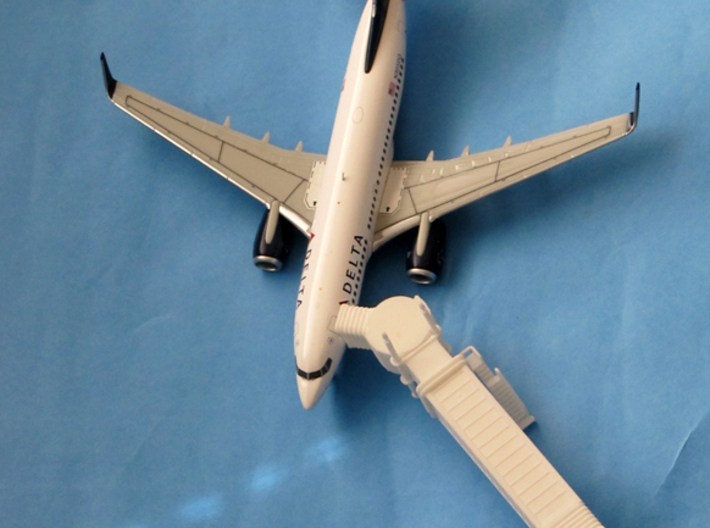
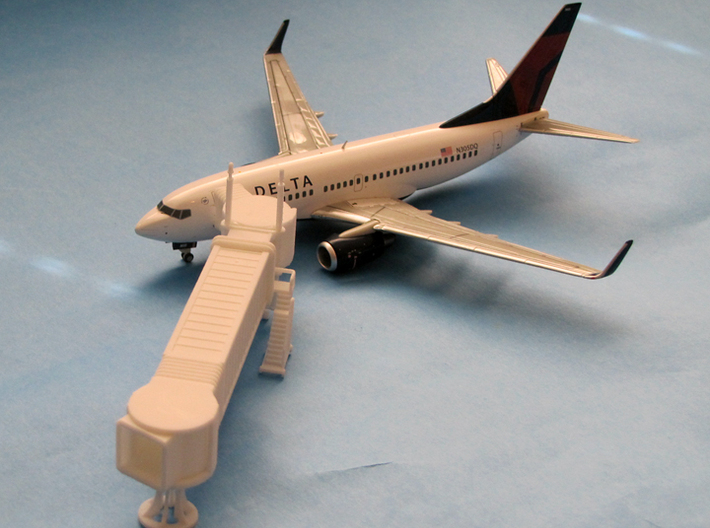
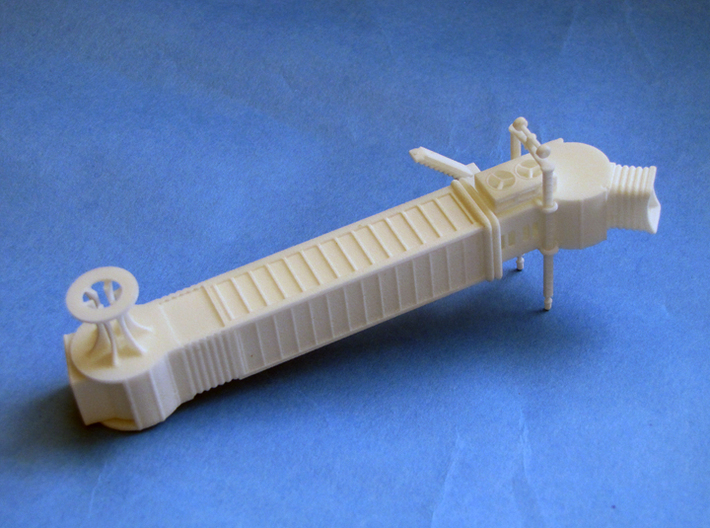
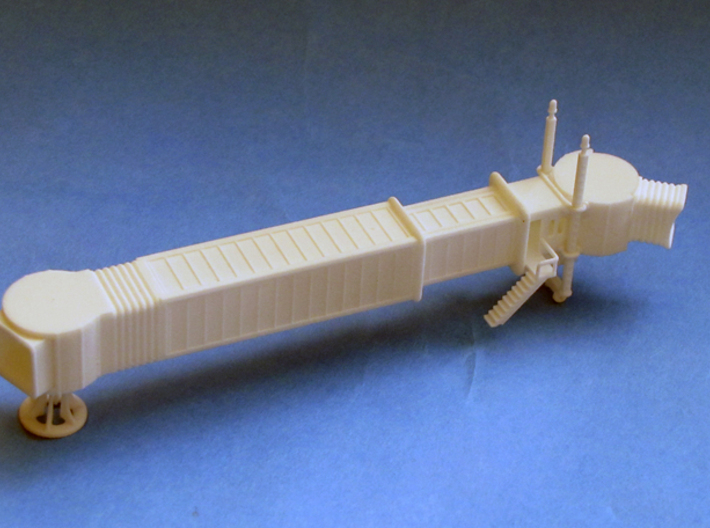
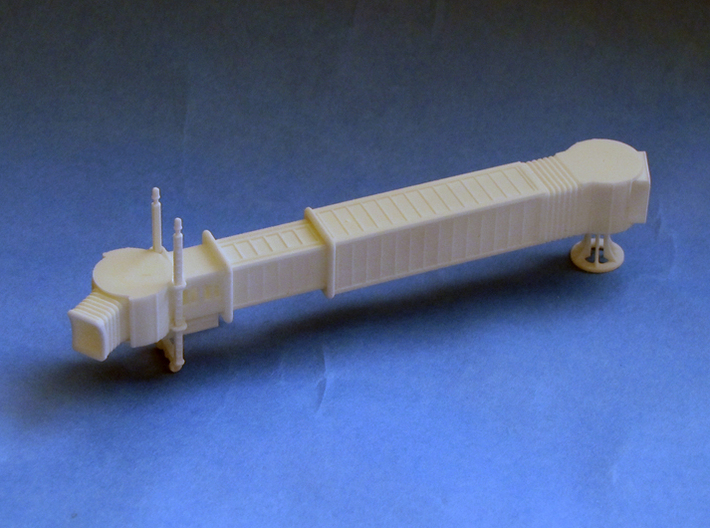
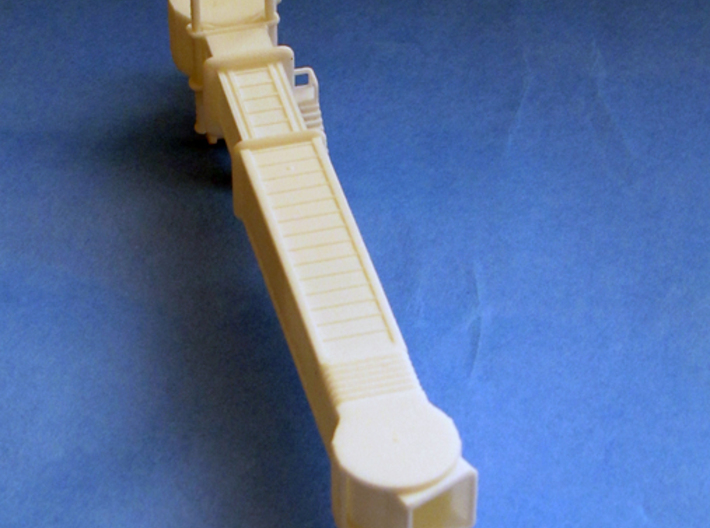
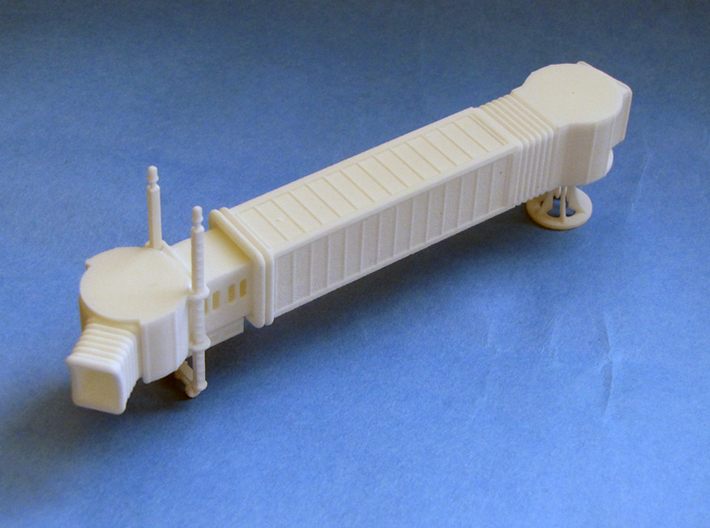
Articulated airport jetway (aerobridge) scale model, with telescoping tunnel, and rotating entryways on both airport terminal and aircraft bellows side. Flexible section and ratcheted riser posts permit the bellows mouth to be moved up or down, to accommodate widebody commercial airliners as well as narrow body executive jets. Separate mobile stairway provided for emergency exit staircase. Intricately detailed model, in 1:200 scale.
All those beautiful photos of the actual 3D prints are thanks to artjock47, and are in White, Strong and Flexible.
Assembly steps
All those beautiful photos of the actual 3D prints are thanks to artjock47, and are in White, Strong and Flexible.
Assembly steps
- The model will ship from ShapeWays as a sprued unit: To avoid parts sticking together instead of rotating or telescoping freely, the model is designed as a snap-fit "kit", all sprued together. When you get the print, just snip off the sprues carefully using a sprue cutter or a fine hobby blade, and sand the sprue points.
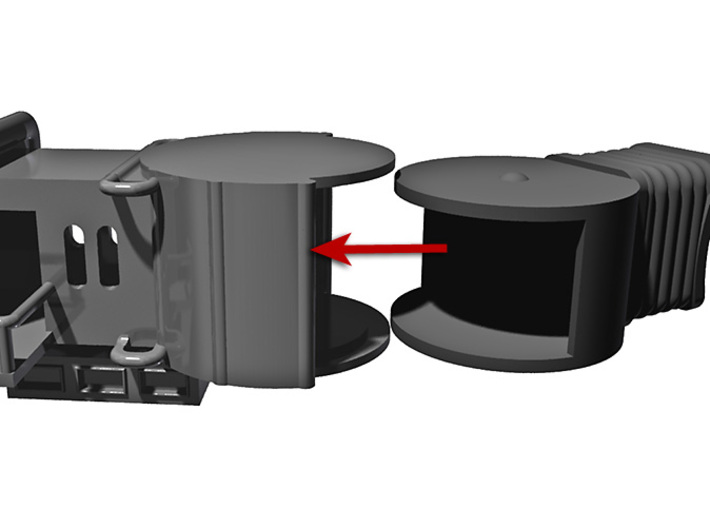
- Snap the cylindrical part of the bellows piece into the hollow cylindrical socket of the cab on the narrower tunnel piece: Note that there are small studs above and below the circular anteroom of the bellows, that will snap into corresponding grooves inside the cylindrical cab portion. To get the bellows correct side up, check that the bellows protrudes a little more on the upper side. Correspondingly, on the cab tunnel piece, the staircase will go downward (just being very pedantic here).
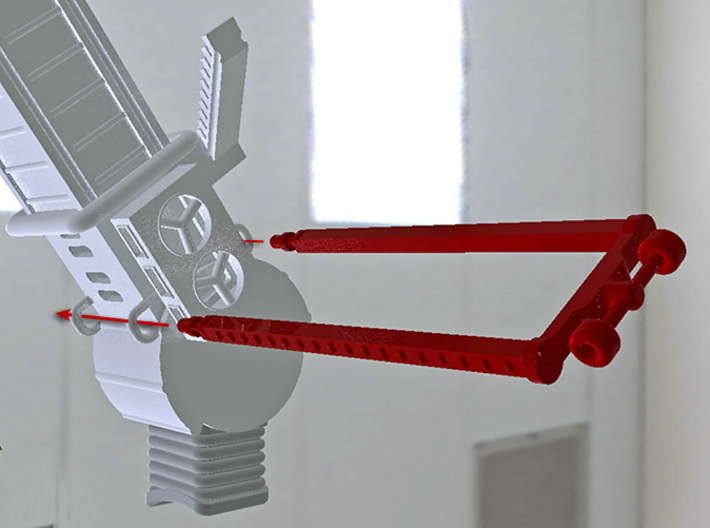
- Carefully slide the prongs of the riser posts with the hazard lights on top, into the two pairs of ring-like piping on the cab piece, from below. Once the "hazard lights" themselves are through the upper rings, the masts will slide through with a slight ratchet action. This is to allow the mast to hold the bellows up to different heights for different aircraft. Once fitted, visually estimate how much gap there is between the inside of the riser posts and the sides of the cab, then pull out the riser posts out again.
- Put a drop of gorilla glue, rubber adhesive or similar adhesive that remains as a blob when cured, on the inside of each of the 4 loops that the riser posts slide through. Each blob should be about the size of the gaps estimated in the previous step. That will push the riser posts outward when fitted again, so the bumps on the risers will have a ratchet action against the outside of the loops. Note that the locations of those blobs is such that they will not be visible once the riser posts are inserted into the loops, hence not impacting the detail of the model.
Once the glue blobs are dry, carefully insert the riser posts through the rings again - Similar to the bellows piece, snap the terminal access piece into the hollow cylindrical socket on the (broader) feeder tunnel piece. No concerns with getting it right side up, since the terminal access-way is identical either way up. Again, note the little nubs which will snap into grooves.
- Slide the cab-side tunnel piece (narrower) into the terminal-side tunnel piece (wider). the gap has a bit of extra play, so that the fit does not need much pressure, and the pieces telescope smoothly.
- Finally, the roll-away extension ladder just slides onto the hanging stairway from the side, thus allowing the cab to be raised and lowered as needed after sliding the stairway away.
- There you have it, your 1:200 jetway should be all set for use on your airport layout!
Please note that there is a flexible section to the terminal-side feeder tunnel, just after the access-way rotunda. This is needed in order to allow the large range of sill heights needed for the bellows to service various aircraft. To use the highest and lowest heights, just extend the tunnel all the way out before adjusting the height by sliding the hazard-light riser masts up or down carefully.
Recommended material: White, Strong & Flexible Polished (WSFP).
For a static model that will not be telescoped or rotated, the Detail Plastic (FD, FUD, TD) options will provide greater visual detail than WSFP can show. However, as these are somewhat brittle acrylics, they tend to break on frequent flexing or articulation, unlike the tough nylon used in WSFP.
Details
What's in the box:
Articulated airport jetway (aerobridge), 1:200
Dimensions:
Success Rate:
First To try.
What's this?
Rating:
Mature audiences only.
