


Luminus LED adapter for corsair h90 water cooler
Made by
Have a question about this product?
contact the designerProduct Description
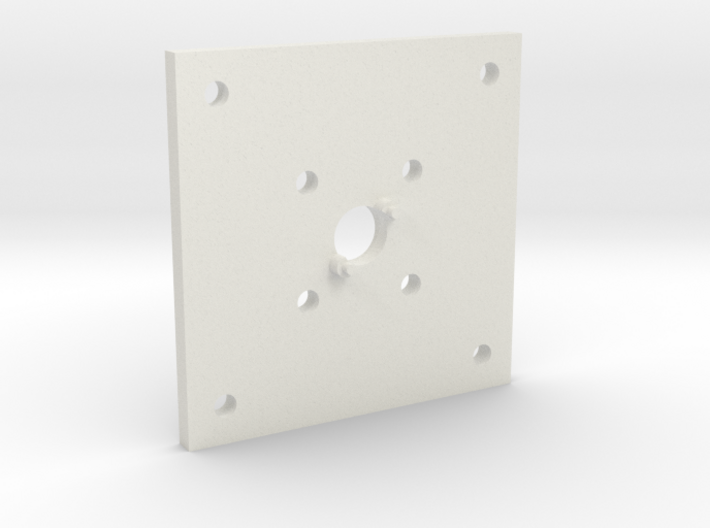
Adapter for applying a computer CPU water cooler to Luminus big chip LEDs.
If you are using a big chip LED from Luminus for a science or DIY illumination project, you will need very efficient cooling. The Luminus development kit comes with a active air cooler, but that's VERY noisy. You can solve the problem with a CPU water cooler, but attaching a commercial cooler to the LED is not trivial.
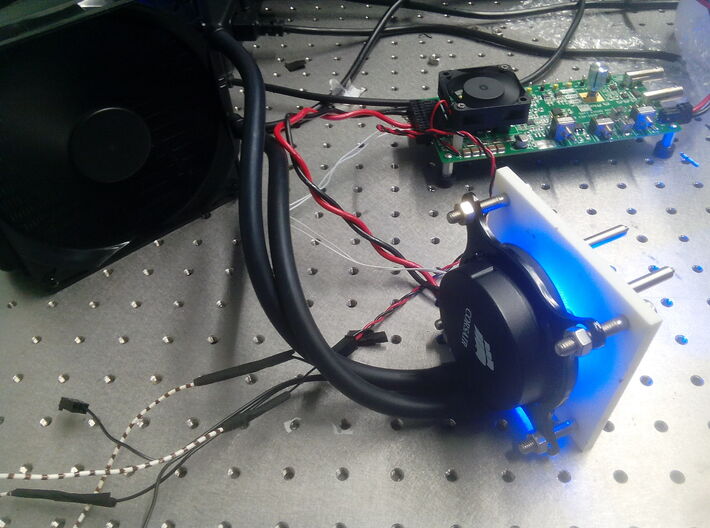
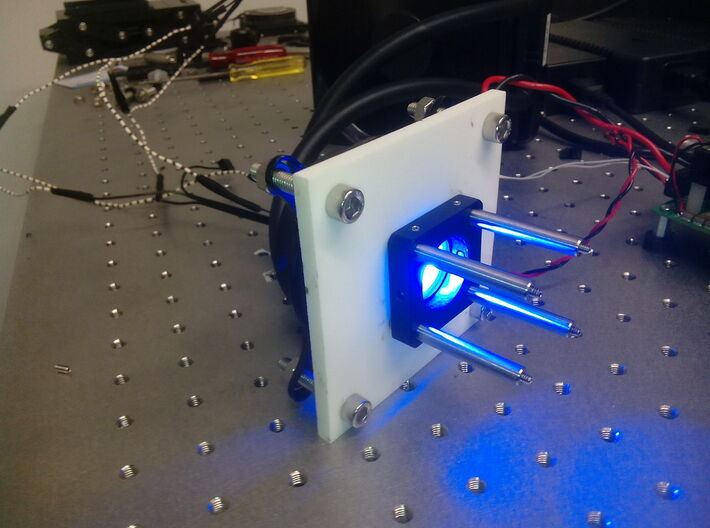
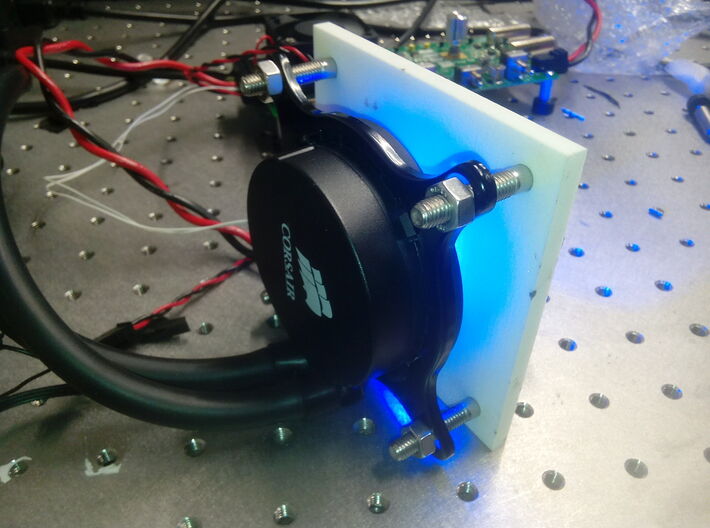
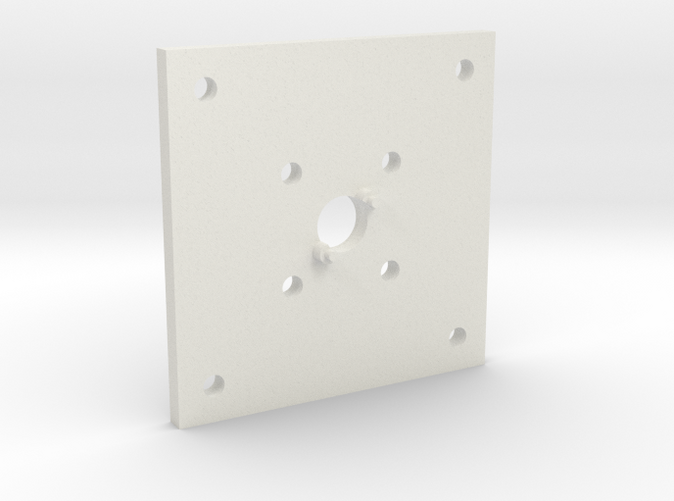
This 3d printed plate allows you to put the LED chip steadily in position on the cooling surface of a corsair H90 cpu cooler. Moreover, the available holes allow you to attach the water cooled LED at the center of a Thorlabs 30 mm cage system, for its inclusion in an optical setup.
What you need for your cooling is:
- Luminus devices 120 series LED, with development kit, or custom power supply
- a corsair H90 water cooler (and 12V supply, if you are not using the Luminus development kit)
- a Luminus 120 series LED (tested with PT-121-B-L11)
- 4x 30mm M6 screws, with 4x M6 nuts
- CPU Thermal paste
OPTIONAL, for integration in a scientific optical setup:
- 3x Thorlabs ER series rods (http://www.thorlabs.com/thorproduct.cfm?partnumber=ER6)
- 1x Thorlabs ERCPS rods stops (http://www.thorlabs.com/thorproduct.cfm?partnumber=ERCPS)
- 1x Thorlabs CP02/M cage plate (http://www.thorlabs.com/thorproduct.cfm?partnumber=CP02/M)
Here are the instruction for installation:
1 - connect the power and thermistor cables to the LED
2 - OPTIONAL: If needed, attach the thorlabs cage system to the internal holes of the plate. Use the ERCPS stoppers on the face with the small columns, and the face plate on the other side. Make sure that the rods only extend on the columned side of the adapter just enough to put the stoppers in place. Just use three rods, one corner should leave space for the LED cables.
3 - insert the screws in the external holes of the plate, with the cap on the side of the plate without the columns. Place it on a flat surface with the columns facing up.
4 - attach to the cooler the metal adapter with holes on a square pattern.
5 - carefully place the LED facing down on the plate, inserting the pillars in the holes at the sides of the LED emitting surface.
6 - apply a uniform and thin layer of thermal paste to the flat back surface of the LED chip.
7 - carefully slide the cooler in position, fix it with nuts.
8 - tighten the nuts evenly, until the system is nicely stable, don't exaggerate with the nuts thightening force.
9 - attach the LED power cables and thermistor cables to the development kit board (or your costum power supply)
10 - attach the cooler 12V power to the water cooler, if you are using the development kit you may need to use a small adapter, or do some simple rewiring.
11 - You can turn on the LED, use the termistor signal to verify that the temperature stays within the desired range.
The system was tested with a PT-121-B-L11 LED, with a stable temperature of 35 celsius achieved at 20A current for 30 minutes. It should be compatible with any luminus LED, as long as the mounting holes at the sides of the chip are 18 mm apart (check luminus datasheet.).
Be careful Using it with UV LED, as the light could melt the 3d printed material.
Also, only print in white strong and flexible, any other color will reduce the diameter of the mounting holes, and colored plates can burn with high LED light intensities.
Details
