color plastic pen blanks

Discussion in 'My Shapeways Order Arrived' started by MrNib, Oct 9, 2014.

  1. MrNib
    MrNib Well-Known Member
    The two blanks on the left were the first ones I ordered. Unfortunately they had 7mm inside diameter holes instead of 8mm which
    is required for the (obsolete) Metallo pen kit. I will try various things to get them smooth and color enhanced. They have more
    frostiness than the new batch of four I received today on the right. I have plenty of Metallo kits for demo units but eventually I will
    need to migrate to other kits.

    newandoldblanks.jpg

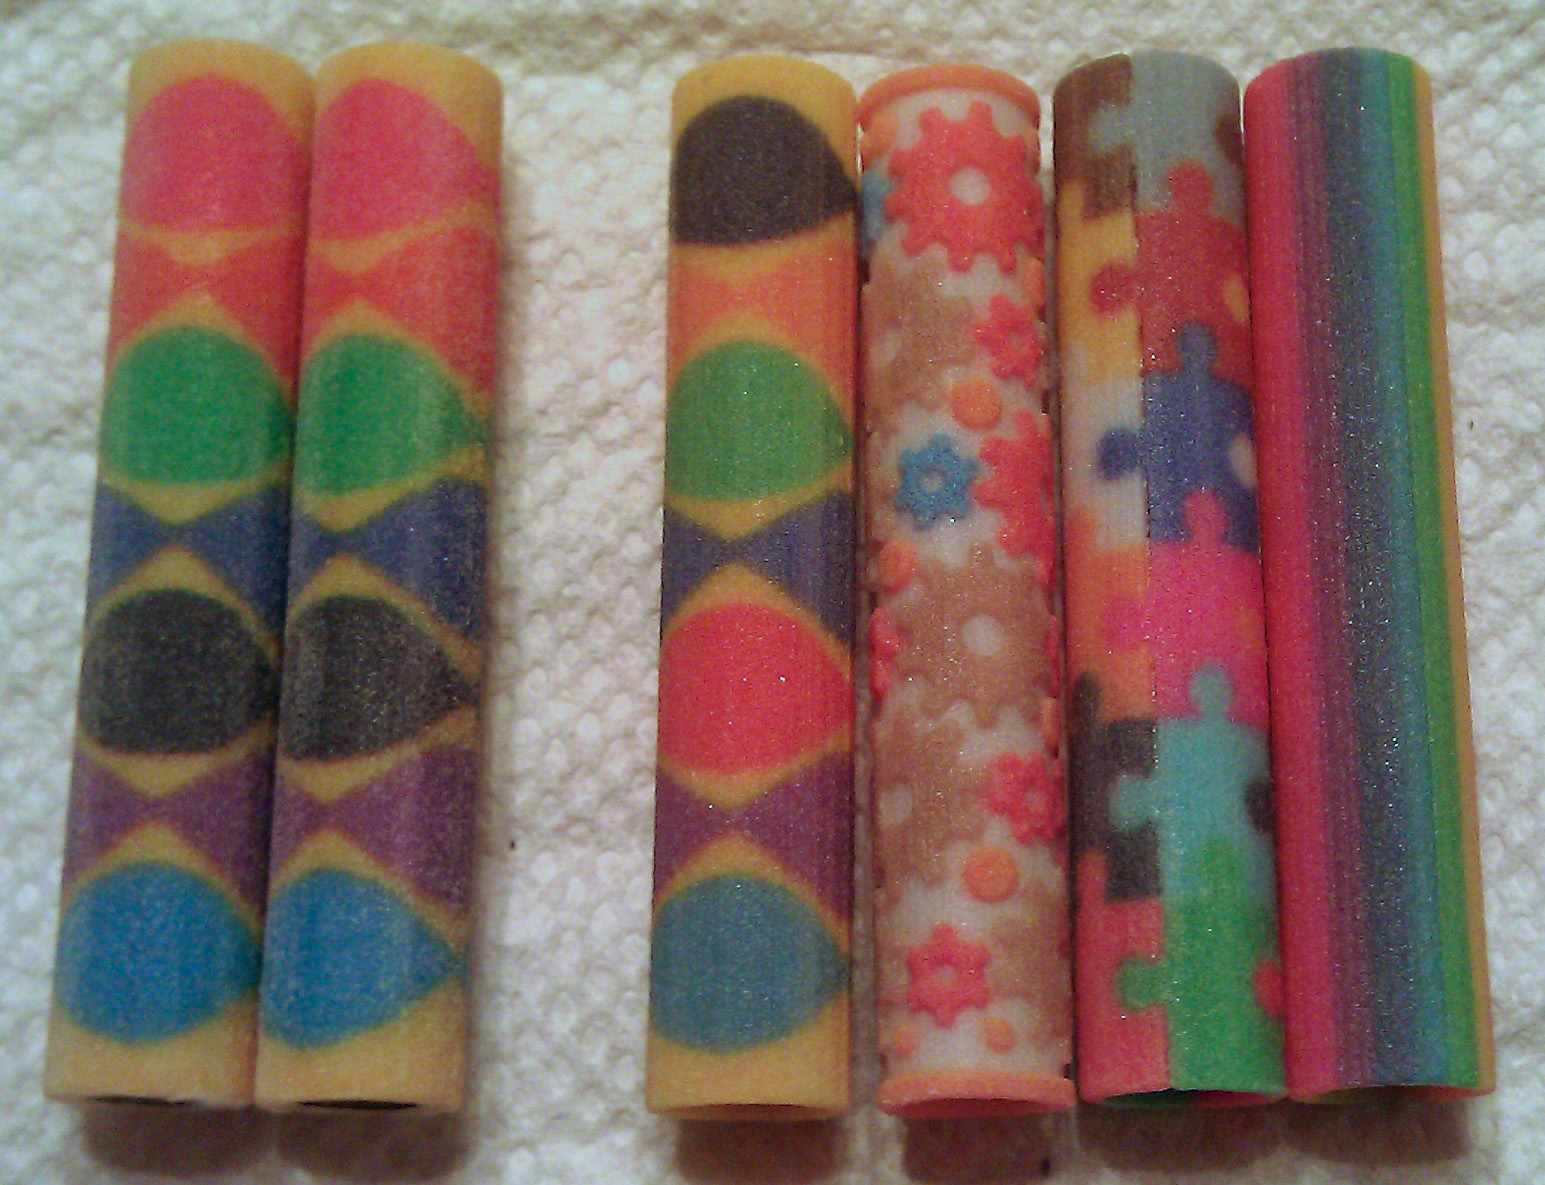
    The first of the new batch has pink and black colors swapped and the red changed to orange. The second with the gears has
    the same outside diameter as all the others but the main core is thinner to give the gears an embossed texture. The third puzzle
    piece blank has some thin gaps which match up to miniscule gaps in the design file so a different type of model construction is
    needed to eliminate them. If desired those small gaps located around each of the puzzle pieces could make it look like pieces
    were inlayed separately by gluing into place. The last blank with long color wedges also suffers from the gaps but they are less
    noticeable for some reason..

    I don't want to coat these with CA glue or lacquer if it can be avoided. I'm hoping that a light polish and buffing will remove the
    frostiness and reveal nicer colors. I saw a recommendation in another thread for using isopropyl to remove frostiness so I might
    also try that. I have a jug of 99.999% pure isopropyl so using that might be more interesting than the standard drug store dilution.

    edit
    I just checked to see if the 8mm brass tubes would fit into the new tubes. I managed to nail the fit perfectly with just a bit of
    friction. These tubes are also very round and exceptionally straight. They don't seem to have any of the warping issues that
    other people have experienced, probably because they are small and compact? I'm very excited to see this color process hit the
    scene. It's definitely a needed development for more interesting and useful pen bodies having both color and physical relief.
     
    Last edited: Oct 10, 2014
  2. stannum
    stannum Well-Known Member
    The gears one has some kind of deformation in the bottom edge. Optical illusion or real?
     
  3. MrNib
    MrNib Well-Known Member

    Maybe a little bit but that should go away during pen assembly when parts get squooshed together in the press. It's not as precise as a brass version, which I think I had made but haven't used yet. :( I must take better inventory of what I have! After the pricing hoopla around here blows over and I repair my store I will sort through my backlog and not start any new projects.

    Normally I make my blanks a little longer longer since the ends get sanded down or trimmed with a barrel trimmer to square off the ends to the correct length. I made this one the required final length for the pen kit and it may even be the same file I used for brass but with color. If I were to do it again I would probably lengthen those end bands to allow for more variation in the 3D production. These blanks are intended for finishing tests and I may only use surplus tubes instead of wasting any complete pen kits.


  4. MrNib
    MrNib Well-Known Member
    I found time to polish the first two blanks on a lathe. I used 400 and 800 grit sandpaper, polishing pads, and a final liquid buffing compound applied with a paper towel for maximum shine.

    first_fcp_polished_flash.jpg

    The bottom tube got a very light sanding treatment just to get a nice smooth and glossy finish. It truly feels like glass or polished acrylic. However there are striation marks that follow the print lines. They seem to be color defects where some uncolored powder got attached to the colored material. If I can find a high power inspection microscope it would be easier to see what's going on there. (Adds that to Christmas wish list...)

    I gave the top tube extra extra sanding which helped to remove most of the lines but the colored plastic layer is so thin that the color itself started to be removed. The polishing results are ok for novelty pens but not so good for higher end stuff. Maybe if the tubes had been fabricated standing up instead of laying down the defect lines would at least be more consistent around the tubes, but we can't specify orientation so so much for that idea.

    I still have the other 4 tubes so I'll see what I can do with those. Clear coating them might be the best thing or maybe wiping them down with a solvent. Not really sure at the moment. Another option might be using a diffusing coating to "hide" defects. So far close but no cigar.