Here are directions for cleaning, removing from the sprue and installing the 32-pack of N scale (1:160) Buda Wheel Stops.
https://www.shapeways.com/model/825438/buda-6-bolt-wheel-stop -n-scale-32pk.html
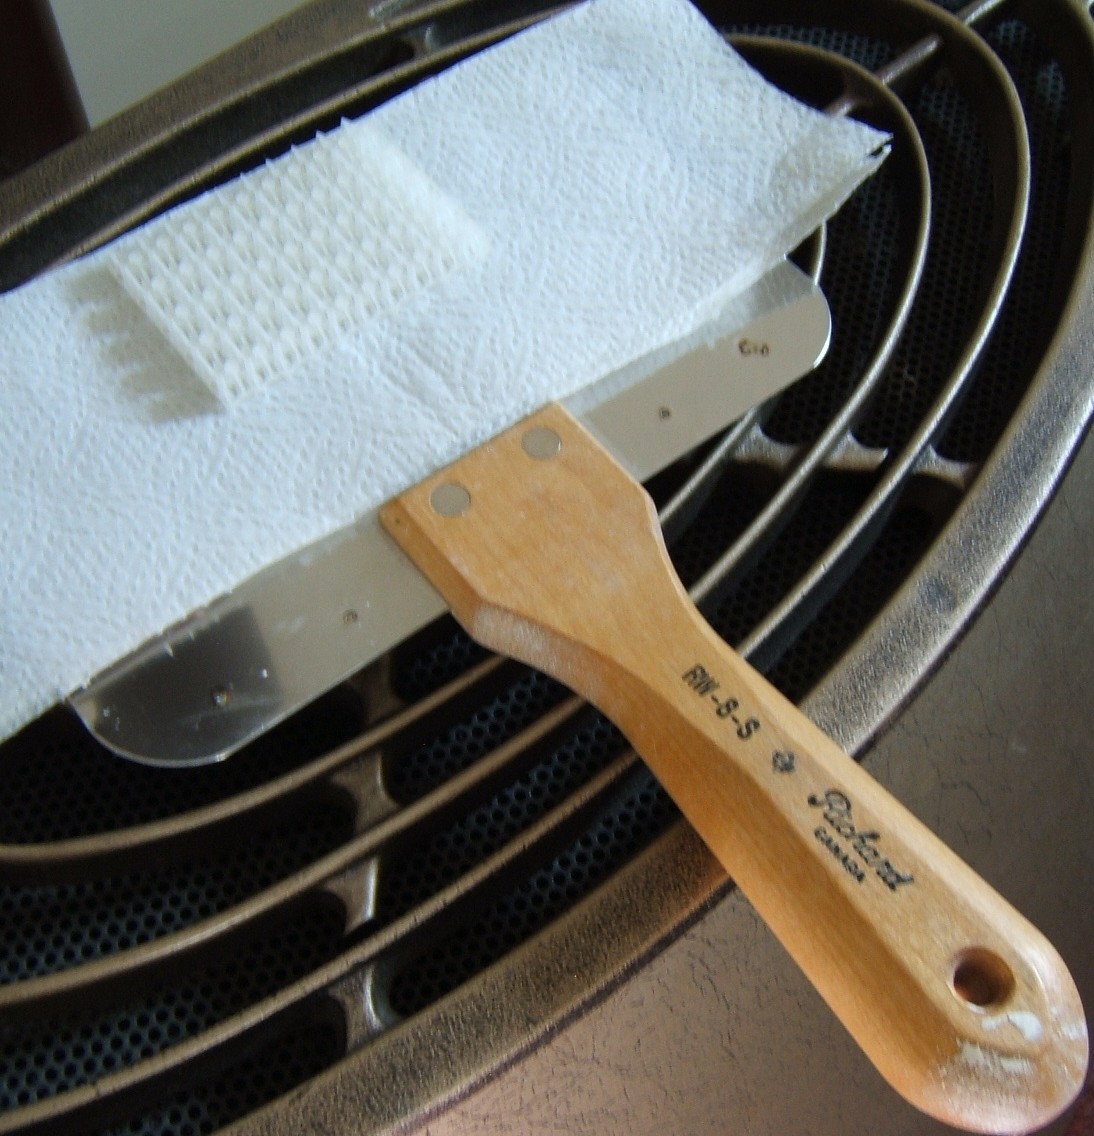
There is a greasy residue of the support material used for printing on the parts; it must be removed in order for paint to stick to them. The support material melts away under low heat; I first set the part on a piece of paper towel over a source of heated air (the top of a indoor gas stove or steam radiator works well; leave it on the dash of the car in summertime) and turn it frequently for 20-30 minutes.
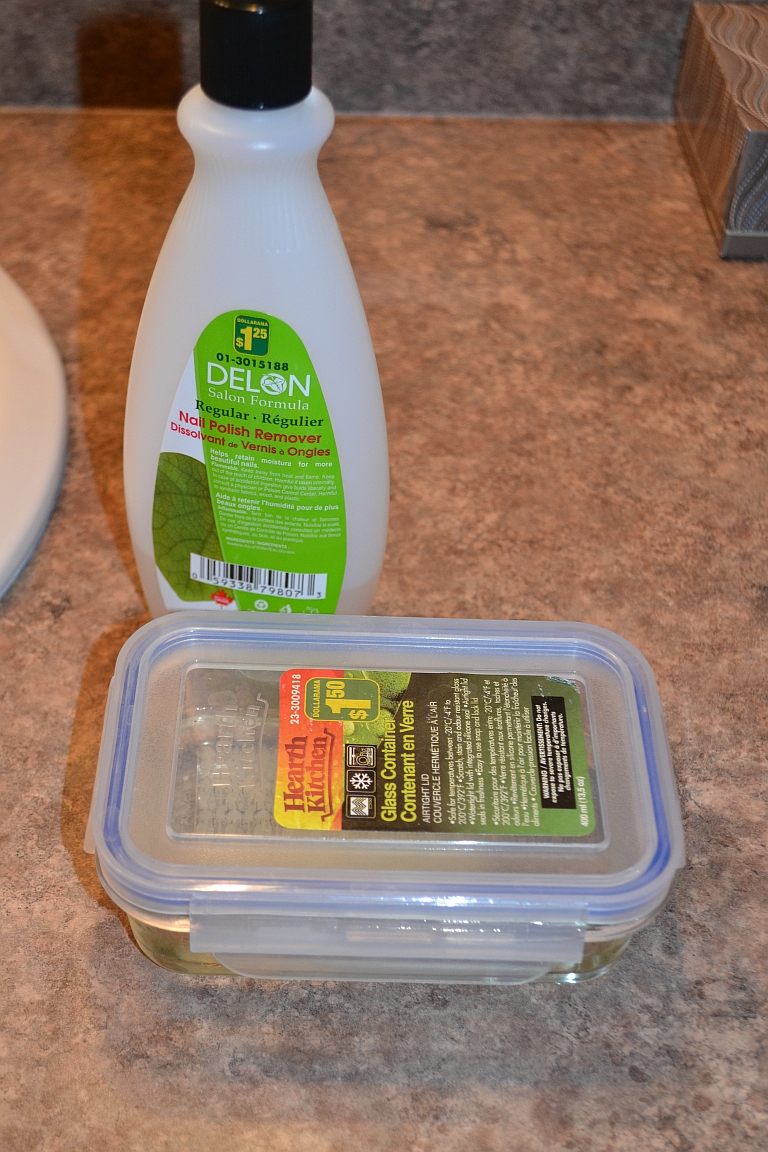
For final cleaning I like to use pure acetone (the cheapest nail polish remover available with no moisturizers in it). I pour enough acetone in a small glass container to fully submerge the part; this container came with a snap-on plastic cover that eliminates any odor problems. I purchased both at the local Dollar store.
Leave the part submerged in the acetone for about 10-15 minutes. If you leave it in longer than that the parts may become soft - don't panic, just remove it from the dish and let it sit on a flat surface. The acetone will evaporate from the parts and they'll become rigid again in about 30 minutes. Wash the parts in warm water (make sure you don't lose any pieces down the drain) and let them sit and dry in the air. You can re-use the acetone; skim off the big globs of support material floating in the dish and pour the acetone back into the bottle to be used cleaning your next order.
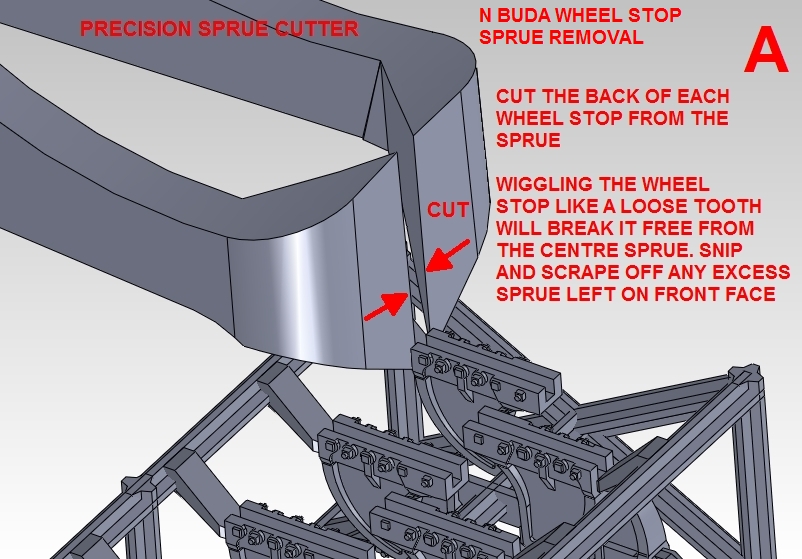
Once the parts are clean they can be removed from the sprue. A precision sprue cutter like the Intermountain BB-1015 or Micro-Mark #82393 is the best tool to cut the parts from the support framework.
https://www.micromark.com/tweezer-sprue-cutter-despruing-twee zer,8012.html
A magnifier is also very helpful, either desktop mounted or an Optivisor. Use the sprue cutter to cut the backs of the wheel stops from the sprue as shown in Step A. There's a notch in the sprue that will pull the sprue cutter against the back of the wheel stop and give you an almost perfectly clean cut.
Once the back of the wheel stop is cut free it can be wiggled like a loose tooth and broken loose from the centre sprue. This method usually leaves a bit of sprue on the face of the wheel stop that has to be cut or scraped off with the sprue cutter. For best results cut the X-bracing away from one end of the sprue and cut each wheel stop loose from the centre sprue as shown in Step B.

Paint the wheel stops (yellow is the most common color used in the real world). Use an airbrush for best results; place several wheel stops on a scrap piece of rail for a handle. If you brush paint them don't use too much paint and bury the surface detail.
Before placing them on the layout make sure the top and sides of the rail is clean - scrape off any paint or gunk where the wheel stop will be placed. Hold the wheel stop with your thumb on the front curved face and your first finger on the back. Place a tiny drop of glue (slow setting ACC or white glue) inside the slot on the bottom of the wheel stop; don't use too much or it'll ooze out and stick to your fingers. Press the front point of the wheel stop under your thumb down onto the rail. Holding the front tip in place on the rail rotate the back of the wheel stop downward onto the rail until the wheel stop is fully seated on the rail.

Repeat 31 times and you're done!