
BlackWingArsenal
3D modeler,
Designer,
Product designer,
Maker

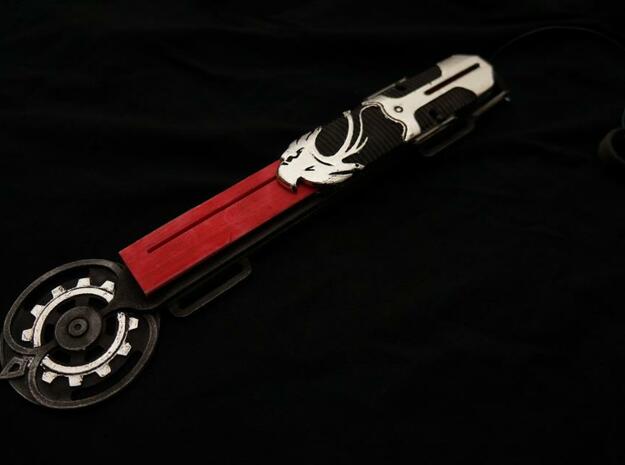
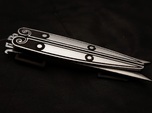
BlackWingArsenal @anthonyv2 yes, this is one of my most simple designs. The black pieces seen in the colored render is the locking mechanism.
BlackWingArsenal @anthonyv2you will need two rubber bands on each side of the blade. You will have to super glue some pieces on, and you'll want a ring and string
BlackWingArsenal @GL2814 I'll add a render of it put together shortly

BlackWingArsenal @alex_jacob2120 Have you received it yet?
BlackWingArsenal @rediraevac the render is uploaded
BlackWingArsenal @michael_lewis1220 It's gravity wielded, but designed to withstand more pressure than other gravity wielded hidden blades.
BlackWingArsenal @rediraevac Ezio's hidden blade was definitely an inspiration for my blade, and sure, I will make the render as soon as I can
BlackWingArsenal @yuanfeng1998 I won't re-size it, I haven't much time, but I have been designing a smaller hidden blade for younger buyers. If you are interested, the blade will have a new design, similar color scheme, but it will be shorter.
Also, if you are willing to draw a design for your blade, I could fit it to your specifications, sizes, colors, etc. I could even offer you the lowest price Shapeways can offer when you purchase your blade.
BlackWingArsenal @Pkr1345 The blade is ambidextrous. But I can try to 'flip' the design.
BlackWingArsenal @justinhabek I used some old thin (but nonetheless strong) rubber babds I found in my house... sorry, I don't know how to answer your question, . I leave it up for experimentation
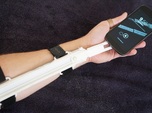
BlackWingArsenal @justinhabek the blade is just above twice as long as it is sheathed
8 1/4 inches shearhed and 16 1/2 inches extended
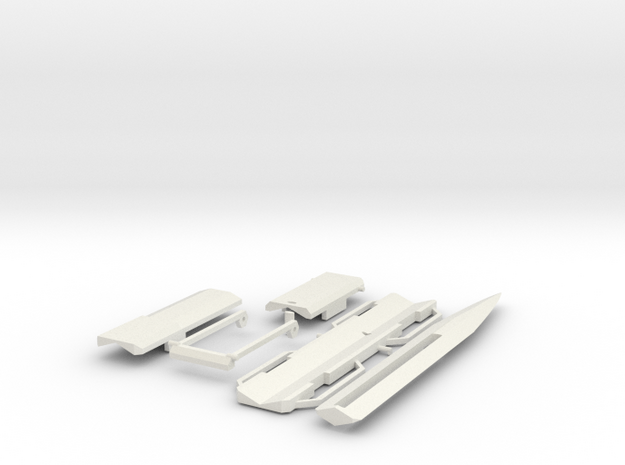
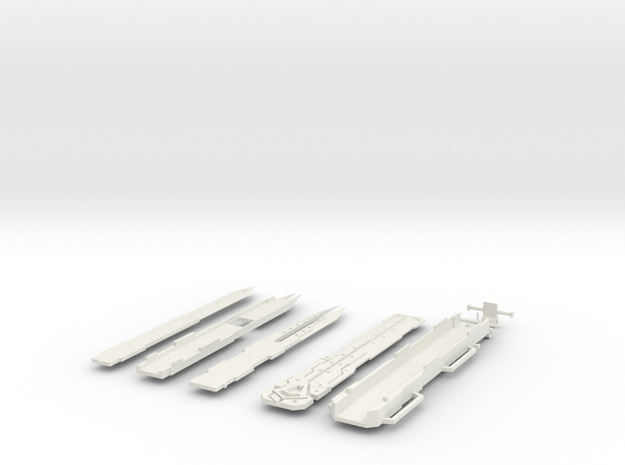
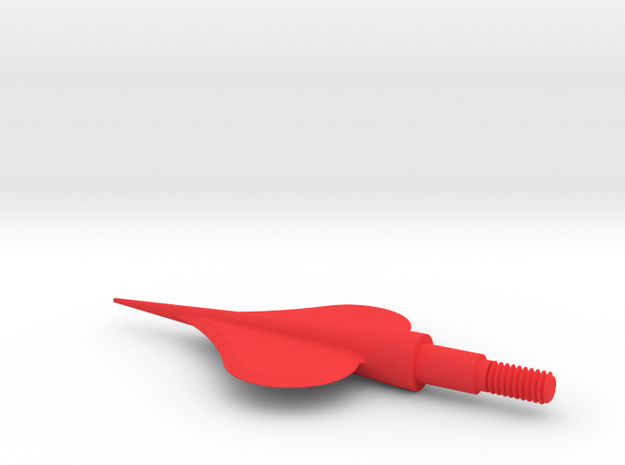
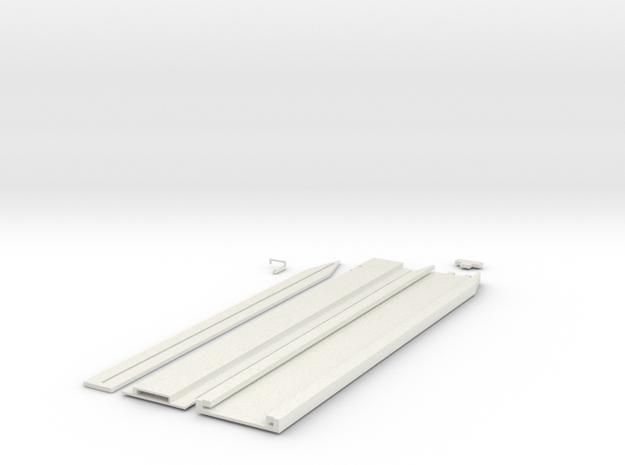
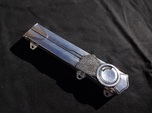
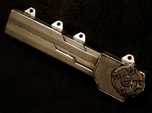
BlackWingArsenal Assembly: (not including the smaller bits) Each part is numbered from left to right. 1 2 3 4 5. #4 (the blade) is placed inside #3, which is then sealed with #5 (notice, use your preferred adhesive to glue together pieces 1 an 2, and 3 and 5, when it is needed, Remember to scrub off all the excessive adhesive to allow the parts to move freely between other parts) once pieces 3 and 5 are glued correctly, and the blade is inside them, repeat the process with the new body (pieces 3 and 5 with blade inside) and place inside piece 2 and cover with 1.
Velcro straps are placed in little inserts on the sides of piece 2.
BlackWingArsenal @GL2814 I have printed it in sandstone multi color. Unfortunately My niece (she loves assassin's creed) broke it while i was gone. I realized that material was too fragile, so i took it down. I would gladly put it back up if anyone wants me to. I one day plan to print it in stainless steel, but i'm assuming we both know that would end up being incredibly expensive. Haha.
I too am a fan of AMMNRA's work. In fact, his work motivated me to print my original design here :j
BlackWingArsenal @rediraevac Sure, i'll get to it soon
BlackWingArsenal @LV55 I'm experiencing problems with my forums, so allow me to just give you my number here. Hope to hear from you soon. 503 490 7640
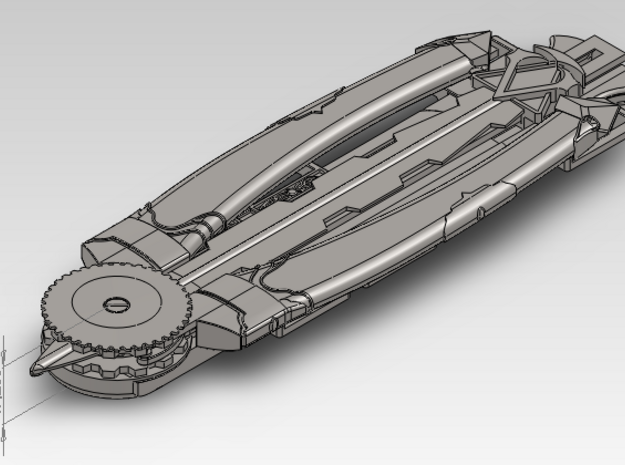
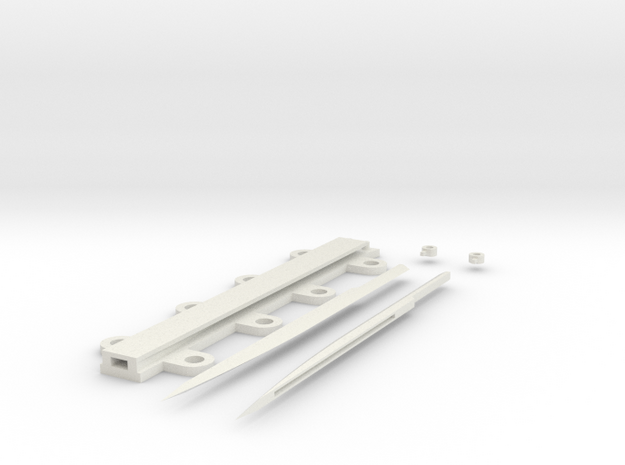
BlackWingArsenal @GL2814The little flap piece lock the blade in and out.
BlackWingArsenal @CelticStudios The piece farthest to the left is the blade, that is placed inside the piece next to it and covered by the piece next to that, once those three are together you should glue them together using epoxy r=or any adhesive of your choice. once that's done, place what you have put together in the piece farthest right in the picture. then place the remaining piece on top and repeat the gluing process.
to put the lock mech together you must insert the flappy piece by the opening of the blade, insert medium rod through the head peice and the flappy peice, then use adhesive to glue the smaller rod through the flappy piece and the rod (make sure they are aligned to do so. once you are done all you need left of some Velcro straps, fishing wire, little but strong rubber bands, and a ring (i would suggest ammnra's adjustable rings for hidden blade).... (they're pretty cool)
Hope this is helpful


BlackWingArsenal does it actually fit in an arrow socket ?
BlackWingArsenal commented on Arno's Phantom Crossbow Replica For Cosplay by Manukeru
January 5, 2016
BlackWingArsenal How far does it shoot?
BlackWingArsenal @Manukeru Ah, I see. Very nice. I admire the detail.
BlackWingArsenal How powerful is the cross bow? And are you selling a blade remotely? And if so, Is it dual action? Or gravity wielded?
BlackWingArsenal How exactly does this work?
BlackWingArsenal How exactly does it work?

BlackWingArsenal added products to a list
September 24, 2015
BlackWingArsenal added a product to a list
September 21, 2015
