
James White from our previous post has been generous enough to share some of his vast expertise with a tutorial for LightWave 3D. For the purpose of the blog post I have included all of the text but reduced some of the screenshots to thumbnails. For the tutorial and full size images visit the tutorial page.
By James White aka Smart Art Studios
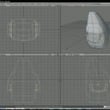
I am going to go over how to create a basic object and prep it for 3D printing using LightWave 3D. For this tutorial I am creating an animated style penguin. The majority of the object will be made using the drag, smooth shift and stretch tools. You may want to take a few minutes familiarizing yourself with these tools if you are new to LightWave 3D.

Creating and Prepping an object in LightWave 3D for 3D printing

Like most objects you will start by creating a box (use the numeric
panel when creating the box to set the size of the object). Now make
several cuts using the knife tool down each axis and one close to the
bottom to add geometry and make it easier to manipulate later on.
Center the object and turn on symmetry so that you can work on both
sides of the object at the same time.

Using the tab key sub patch the model to round it out and give it a
more fluid and organic look and start moving points to get the general
shape that you are looking for. Use the drag tool and move the points
on one side of the object. If you object is centered then the points on
the other side should move as well. Once you have the general shape
down it is time to start making some of the more prominent features of
the penguin.


Select the poly’s on the sides of the object and smooth shift and
stretch them out to get the general shape of the wings. Once you have
the general shape select the polys that outline the wings (make sure
not to select the polys on top) and smooth shift and stretch those in
to give the wings more definition and depth. Use the drag tool to shape
the wings and model by dragging points to get the desired look.


Now we move to the bill. Use smooth shift and stretch to get the
desired look and shape that you want. Now select the polys on the
underside of the bill. Smooth shift and drag to make the bottom of the
bill. Now select the polys in the center of the bill just like you did
for the wings and smooth shift and stretch them in to make it look as
if there is a top and bottom. Select the bottom and stretch to make it
smaller than the top part of the bill.

The same method of smooth shift and stretch will be used for the tail as well.


To make the feet you will first want to smooth shift the bottom of the
object to make it flat. Then you will move to a new layer and create a
smaller box to make the feet. Make several cuts and move the points to
get the general shape. Mirror the object and then press tab to sub
patch.Smooth shift the tops of the feet to flatten and them move them
as close as you can to the bottom of the model without over lapping so
that they will print as one object. Then move points on the rest of the
model to get the desired shape.


To make the face and eyes you will use smooth shift and stretch to add
geometry and make the indentations. Now in a second layer, use the ball
tool and stretch to make the eyes. Adjust the holes so that the eyes
fit inside without overlapping.
Now it is time to do any final tweaking that you may want to do to get
the desired look and shape. You can make a fat or skinny penguin. Now
it is really up to you to add more detail and really make the model
your own.


If you like you can add some color to your object to get a better idea
of what the final product will look like. Select the polys of the area
that you want to add color to and press Q. This will bring up the
window to name a color and choose the color that you like. Do this for
each color that you wish to use. I have named and made 3 colors for
this model. Black, white and orange.


Before freezing your mesh I would recommend saving the model unfrozen
then modifying the name (such as adding Frozen) so that if you want to
make changes and or use the same model as a base you will have an
unfrozen version available. Once you freeze your model you will not be
able to make easy adjustments to it. Now you will want to freeze your
mesh. Once the mesh is frozen press tab to sub patch and you can freeze
again to make the surface polys smaller. This will help make your
printed model smoother. Be careful not to do this to many times as it
may cause manifold errors.

Now you will need to export your object into a format that is
recognized by Shapeways. LightWave can export as a Colloda file which
is a recognized format.
Helpful tip:
If you would like to cut down on costs you can hollow out your object.
You can do this by creating another square inside of the current
object, Press tab to sub patch and then move the points to fill the
object. Make sure not to get it to close to the outer walls or they
will become to thin. Then press f to flip the (inside) object inside
out.
Or you can select a poly on the bottom and smooth shift and stretch it
to a small poly. Move it up into the model and repeat until the inside
is hollowed out. This method will leave a small hole in the bottom but
may be preferred for printing as it leaves a hole for venting.
I hope that this little tutorial on how to create a simple object for
printing has helped out. If anyone has any further questions please
feel free to find me on the Shapeways forums and send me a message.
![]()
You can also use the Chrome Cow STL plugins to import/export STL files:
http://www.chromecow.com/downloads/lscript/shm-stl-tools/
I use ’em all the time 🙂
cool, thanks
I will add it to the Tutorial page too..
Very nice tutorial and a nice introduction to “biological” modeling in general.
I’ve used Lightwave in the past but switched to Blender recently but the tutorial is still useful, since the same basic tools are available in Blender.. all you need to do is add a “Subsurf” modifier to a cube, find the corresponding tools/shortcuts and have at it. 😀